The BIOS (Basic Input/Output System) is responsible for booting up your computer and initializing hardware components. If you’re having issues with your computer and suspect that resetting the BIOS might help, here are quick steps you can try.
Clear CMOS Jumper:
- Locate the CMOS jumper on the motherboard.
- Move it to the “Clear” position, wait briefly, and then return it to the original position.
- Reconnect power and turn on the computer.
Remove CMOS Battery:
- Find the CMOS battery on the motherboard.
- Remove the battery for 5-10 minutes.
- Reinsert the battery.
- Reconnect power and turn on the computer.
However, handle hardware carefully and get assistance if you’re unsure.
What Are The Common Causes of No Display?
The absence of display output often stems from common causes like faulty connections, hardware issues, or incompatible settings, highlighting the need for systematic troubleshooting approaches.
Hardware Issues:
Faulty Graphics Card: A malfunctioning graphics card can result in a no display issue. It might be due to physical damage, overheating, or simply wear and tear.
Try reseating the graphics card in its slot, checking power connectors, and testing with a known working graphics card if available.
Loose Connections: Loose cables or connections between components like the monitor, graphics card, or motherboard can lead to no display problems.
Inspect and reseat all relevant cables and connections. And ensure they’re securely attached.
RAM Problems: Incorrectly seated, faulty, or incompatible RAM modules can prevent the system from booting and displaying anything.
Reseat RAM modules, test with individual modules, and ensure they match the motherboard’s compatibility.
Software Issues:
Corrupted BIOS Settings:
Incorrect changes to BIOS settings or a corrupted BIOS can lead to display problems.
However, clear CMOS to reset BIOS settings to default, or use BIOS recovery options if available.
Incompatible Hardware Changes:
Adding new hardware that’s not compatible with the existing system can cause conflicts and prevent booting. Additionally, remove or replace recently added hardware and verify compatibility before making changes.
Malware or Virus Interference:
Malicious software can potentially interfere with the system’s boot process and prevent display output. In addition, boot into safe mode (if possible) and run thorough malware scans using a reliable antivirus program.
How Can You Prepare for a BIOS Reset?
Preparing for a BIOS reset involves a few key steps, including backing up important data, identifying the correct reset method for your motherboard.
Safety Precautions:
Power Supply and Grounding:
Before working on your PC, ensure it’s unplugged and you’re properly grounded to prevent static discharge that could damage components. However, use an anti-static wrist strap, work on a static-free surface, and avoid wearing clothing that generates static.
Backup of Important Data:
A BIOS reset may lead to some settings being lost. Ensure critical data is backed up to prevent data loss. In addition, save essential documents to an external drive or cloud storage.
Gathering Necessary Tools:
Screwdrivers:
Different parts of your PC may need to be accessed. Having a set of appropriate screwdrivers is essential. In addition, phillips-head and flat-head screwdrivers of varying sizes.
Documentation for the Motherboard:
Your motherboard’s manual will provide crucial information about its layout, connectors, and BIOS reset procedures. In addition, it helps identify components and locate CMOS jumpers or BIOS recovery options.
USB Drive for BIOS Update (if Applicable):
Some motherboards support BIOS updates via USB drive. This can help recover from a failed reset. Hence, download the latest BIOS update from the manufacturer’s website and follow their instructions for using a USB drive.
How Can You Reset BIOS Without Display?
Resetting the BIOS without a display requires a cautious approach.
Clearing CMOS using Jumpers:
Locating the CMOS Jumper on the Motherboard:
The CMOS jumper is a set of pins on the motherboard that are used to clear the BIOS settings. It’s usually labeled as “CLR_CMOS” or something similar. Moreover, it refers to your motherboard’s manual to find the exact location of the CMOS jumper.
Steps to Reset BIOS using the Jumper:
Turn off the computer and unplug it from the power source.
Move the CMOS jumper from its default position (usually covering two pins) to the “Clear” position (covering the “Clear” pin and another pin).
In addition, wait for a few seconds and then move the jumper back to its original position.
Hence, plug in the computer and power it on. BIOS settings should now be reset.
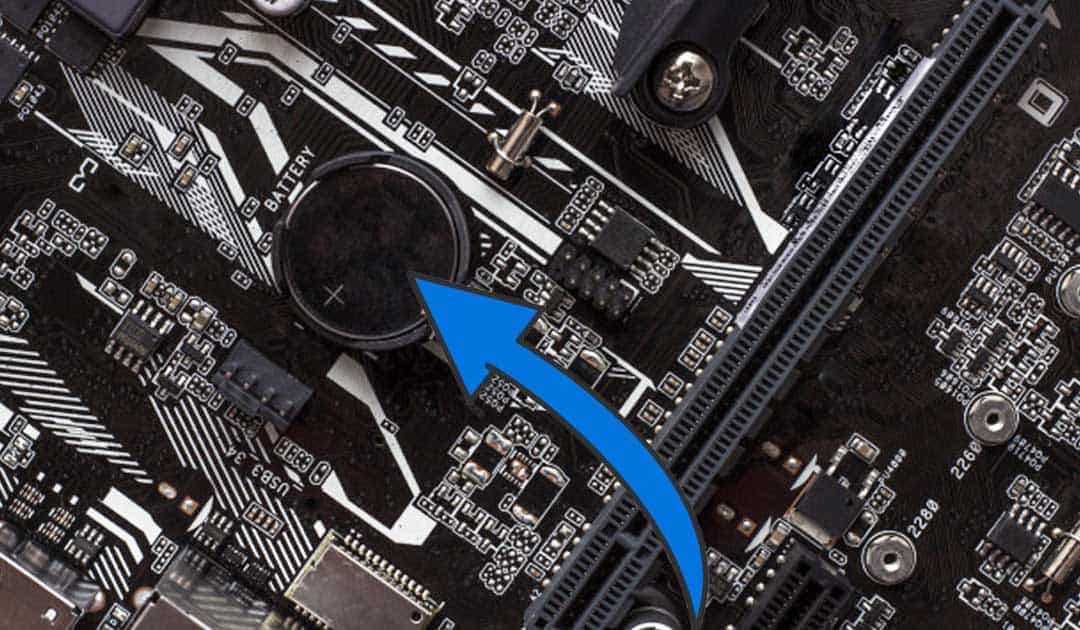
Removing and Reinserting CMOS Battery:
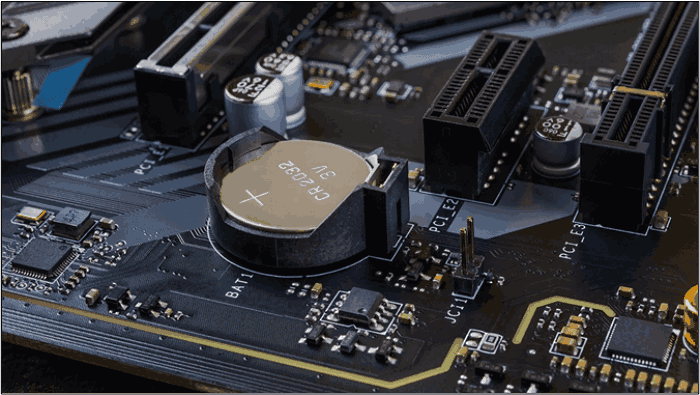
Identifying the CMOS Battery:
The CMOS battery is a small, coin-shaped battery located on the motherboard. It provides power to the CMOS chip that stores BIOS settings. However, look for a round battery holder near the edges of the motherboard.
Safe Removal and Reinsertion:
- Turn off the computer and unplug it from the power source.
- Gently remove the CMOS battery from its holder. Use a non-metallic tool if necessary.
- Wait for a few minutes to ensure the CMOS chip is fully discharged.
- Reinsert the battery in the correct orientation and secure it in its holder.
- Plug in the computer and power it on. BIOS settings should be reset.
Using BIOS Recovery Feature (if Available):
Downloading the Correct BIOS Version:
- Visit the motherboard manufacturer’s website and download the appropriate BIOS version for your motherboard model.
- Ensure compatibility and download the latest stable version.
Preparing a USB Drive for BIOS Recovery:
- Format a USB drive to FAT32 and create a folder named “BIOS” on it.
- Copy the downloaded BIOS file into the “BIOS” folder.
Steps to Recover BIOS using USB Drive:
- Turn off the computer and insert the USB drive with the BIOS file.
- Some motherboards have a dedicated USB port for BIOS recovery; refer to your manual for guidance.
- Follow the specific key combinations or instructions provided in the manual to initiate BIOS recovery mode.
- The motherboard will automatically detect the BIOS file on the USB drive and initiate the recovery process.
- Once the process is complete, the system should restart, and you may regain display output.
How Can You Effectively Troubleshoot Issues?
Effective troubleshooting involves a structured process:
Reconnecting Hardware Components:
Ensure all internal components, including RAM, graphics card, and power connectors, are securely seated in their respective slots.
Verifying Display Connections:
Double-check that all display cables are connected properly to both the monitor and the graphics card (if applicable).
Testing the System with Minimal Hardware:
If the problem persists, try booting the system with only essential components attached (CPU, one RAM module, power supply) to isolate potential faulty hardware.
Checking for Error Codes or Beep Sounds:
Some motherboards have built-in LED indicators or beep codes that can provide clues about the nature of the problem. Refer to your motherboard manual for interpretation.
“What are some preventive measures to avoid potential issues?”
Keeping your BIOS up to date is important for stability, security, and compatibility with new hardware or software.
Regular BIOS Updates:
Visit your motherboard manufacturer’s website regularly to check for BIOS updates. Follow their instructions for safe and effective updates.
Documenting Hardware Changes:
Whenever you make changes to your hardware, such as adding new components or upgrading, keep detailed records. I
In addition, documentation helps you troubleshoot in case issues arise after changes. It also aids professionals if you seek external help.
Avoiding Unnecessary Changes to BIOS Settings:
Changing BIOS settings without proper understanding can lead to problems, including no display issues.
Moreover, only modify BIOS settings when necessary and if you understand the implications. Avoid experimenting with settings you’re unfamiliar with.
FAQs
How long should I wait before reinserting the CMOS battery?
Waiting around 5 to 10 minutes after removing the CMOS battery can help ensure that the residual charge in the system dissipates, leading to a more effective reset.
Can I reset the BIOS using software alone?
In most cases, a no display issue would prevent you from accessing the BIOS settings through software. Hardware-based methods like jumpers or battery removal are often necessary.
What should I do if my computer beeps after a BIOS reset?
Beep codes indicate a hardware issue. Refer to your motherboard’s manual for the specific beep code interpretation to identify the problem.
Why do I need to back up my data before a BIOS reset?
A BIOS reset could potentially change settings that affect system boot order or other configurations. While rare, it’s wise to have a backup in case any unexpected issues arise.
How do I know if my BIOS update was successful?
Some motherboards show a progress bar or a message during the BIOS update process. If the update completes without errors and the system boots normally, it’s likely successful.
Can I recover my BIOS if the USB drive is not recognized?
Ensure the USB drive is formatted correctly (usually FAT32) and contains the correct BIOS file. Try using a different USB port and verifying that the BIOS recovery procedure is followed precisely.
Is it safe to clear CMOS to fix a no display issue?
Clearing CMOS is generally safe, but it will reset BIOS settings to default. Ensure you have access to the necessary settings and data, and follow the correct procedure to avoid damaging hardware.
How can I prevent BIOS-related issues in the future?
Regularly update your BIOS using official updates from your motherboard manufacturer. Avoid making unnecessary changes to BIOS settings, and carefully document any hardware changes you make.
What should I do if none of the troubleshooting steps work?
If you’ve exhausted all DIY options and still have no display, consider seeking help from professionals who specialize in computer hardware repair and diagnostics.
Conclusion
In conclusion, troubleshooting a no display issue in your computer’s BIOS can be a challenging but rewarding endeavor.
Moreover, the BIOS serves as the heart of your system, and ensuring its proper functioning is crucial for overall performance. Throughout this guide, we’ve explored the various aspects of resetting the BIOS when faced with no display, as well as the steps to take before and after the reset.
By understanding the common causes of no display, both hardware and software-related, you can effectively diagnose the problem and take appropriate actions. Whether it’s a faulty graphics card, loose connections, or corrupted BIOS settings, you now have a comprehensive understanding of the potential culprits.
Moreover, preparing for a BIOS reset involves following safety precautions to safeguard your hardware and data, as well as gathering the necessary tools for a successful reset process. In addition, clearing CMOS using jumpers, removing and reinserting the CMOS battery, or utilizing BIOS recovery features can all play a pivotal role in resolving the issue.